Digital Resume
Welcome back to TPE! This post will be a little out of the ordinary as it covers a pure software project and not one of the ongoing mechatronics projects (namely - The Useless Box), however I thought it may be an interesting addition those with an interest in web development may enjoy.
Motivation
When you hear the word 'resume,' you likely envision a concise, one-page PDF document that is commonly requested by the majority of employers during the hiring process. However, this digital resume project goes beyond emulating a traditional resume. It serves as a valuable supplement, offering a holistic and easily understandable summary of an individual's persona, experience, and projects. By incorporating SEO tactics, it also enhances their online presence, making it effortless for interested parties to gain an overview and establish contact.
Design Process
It all starts with an idea. The motivation section concisely represents what the goal was, however the origins of this project stem from when I have previously Googled the names of various people I've needed to contact and was presented with a nicely laid out digital portfolio. It's always something I've wanted for myself and recently I decided that it's a project I wanted to undertake.
Then comes the conceptualization. What do I want it to look like? What content should it hold? How will I design the overall UX (user experience)? These questions are, very honestly, hard. There are so many directions you can take things, and if you're like me you'll have quite a hard time making final decisions. In the context of web development, specifically, there are some tools that can help you along the way.
In order to understand how a design will look once implemented, some people elect to draw the layout by hand. As someone who lacks artistic skills, this was never an appealing option for me and whenever I attempted, it was of no help.
Mockups
Adobe XD is a very powerful design tool that makes designing websites much easier and allows you to fully visualize how your design will look once implemented. Here are some examples of mockups I made before writing the actual implementation:
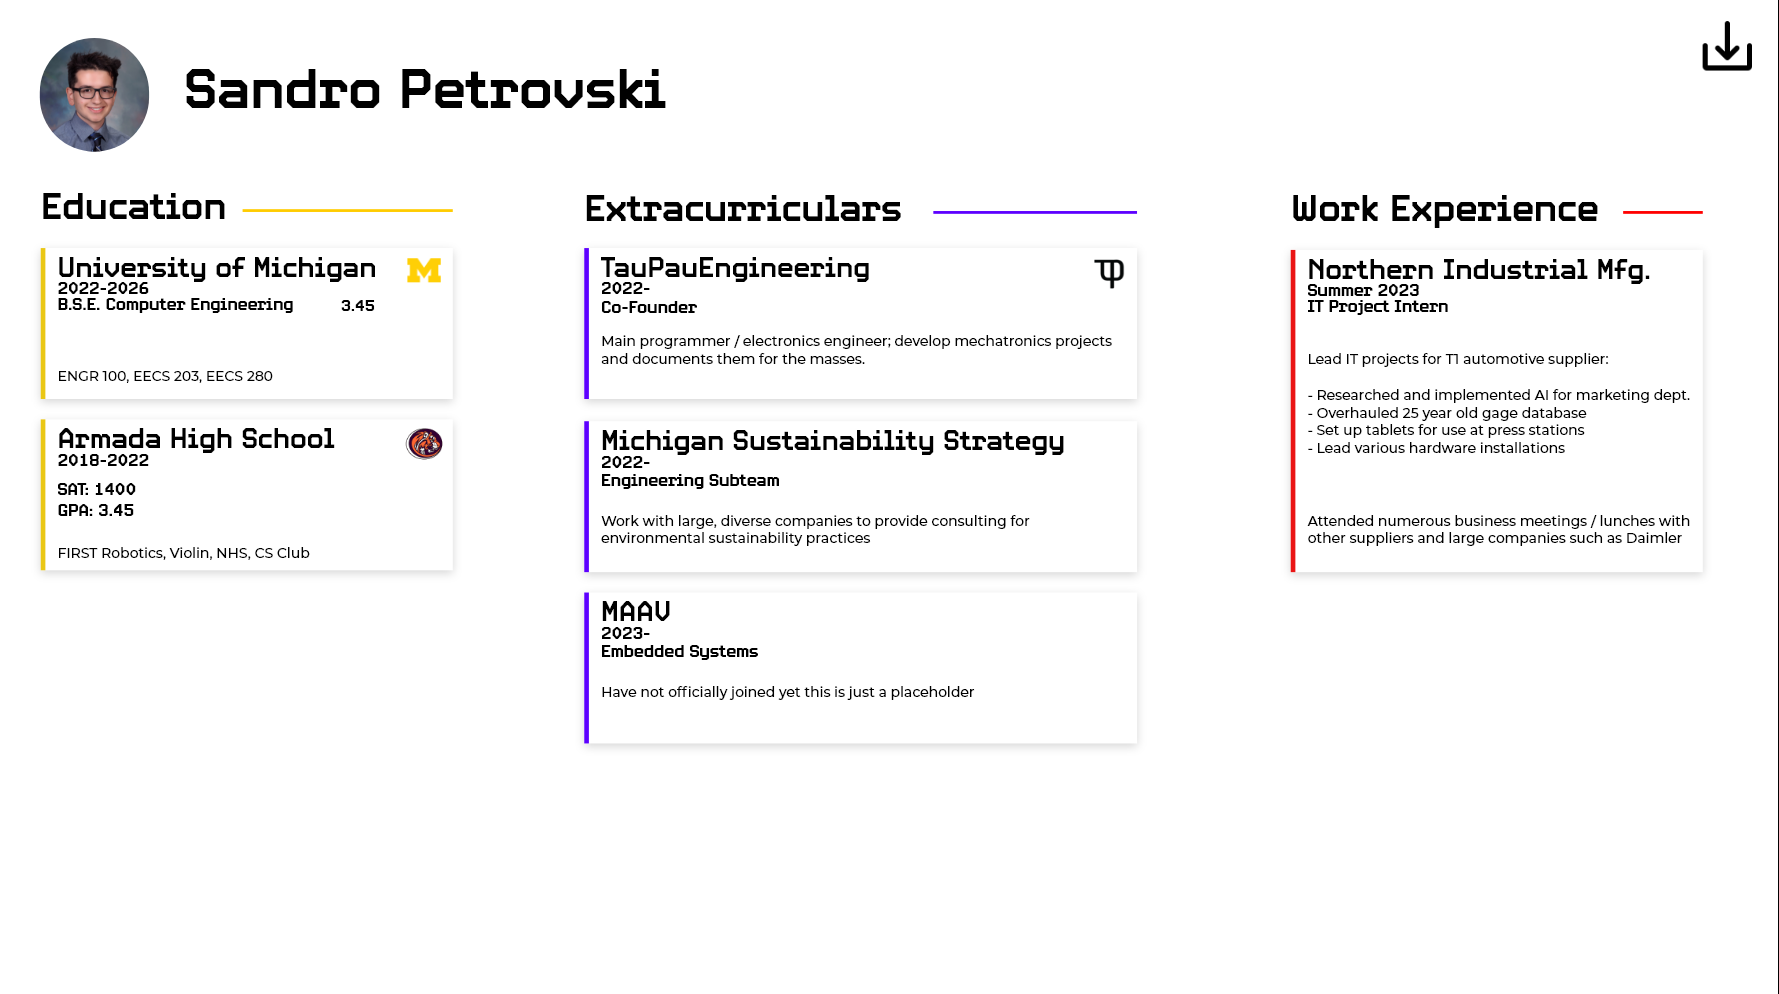
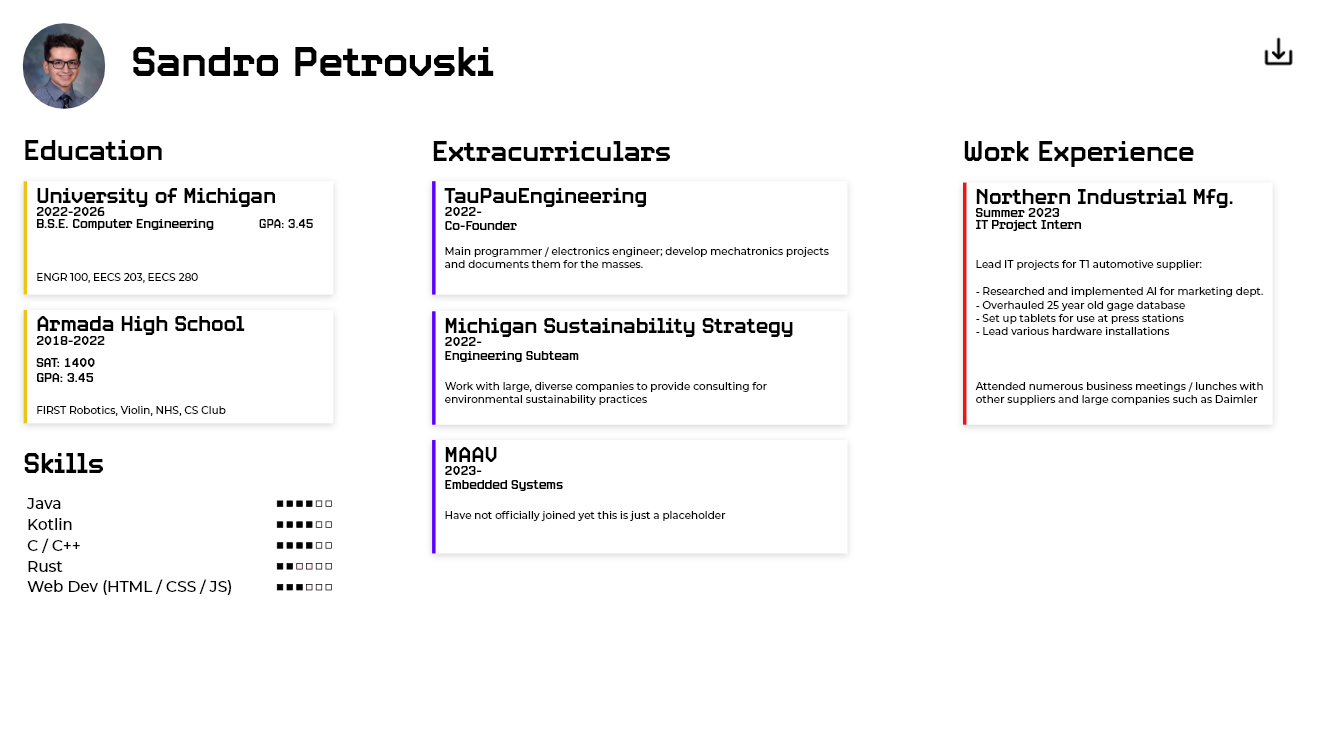
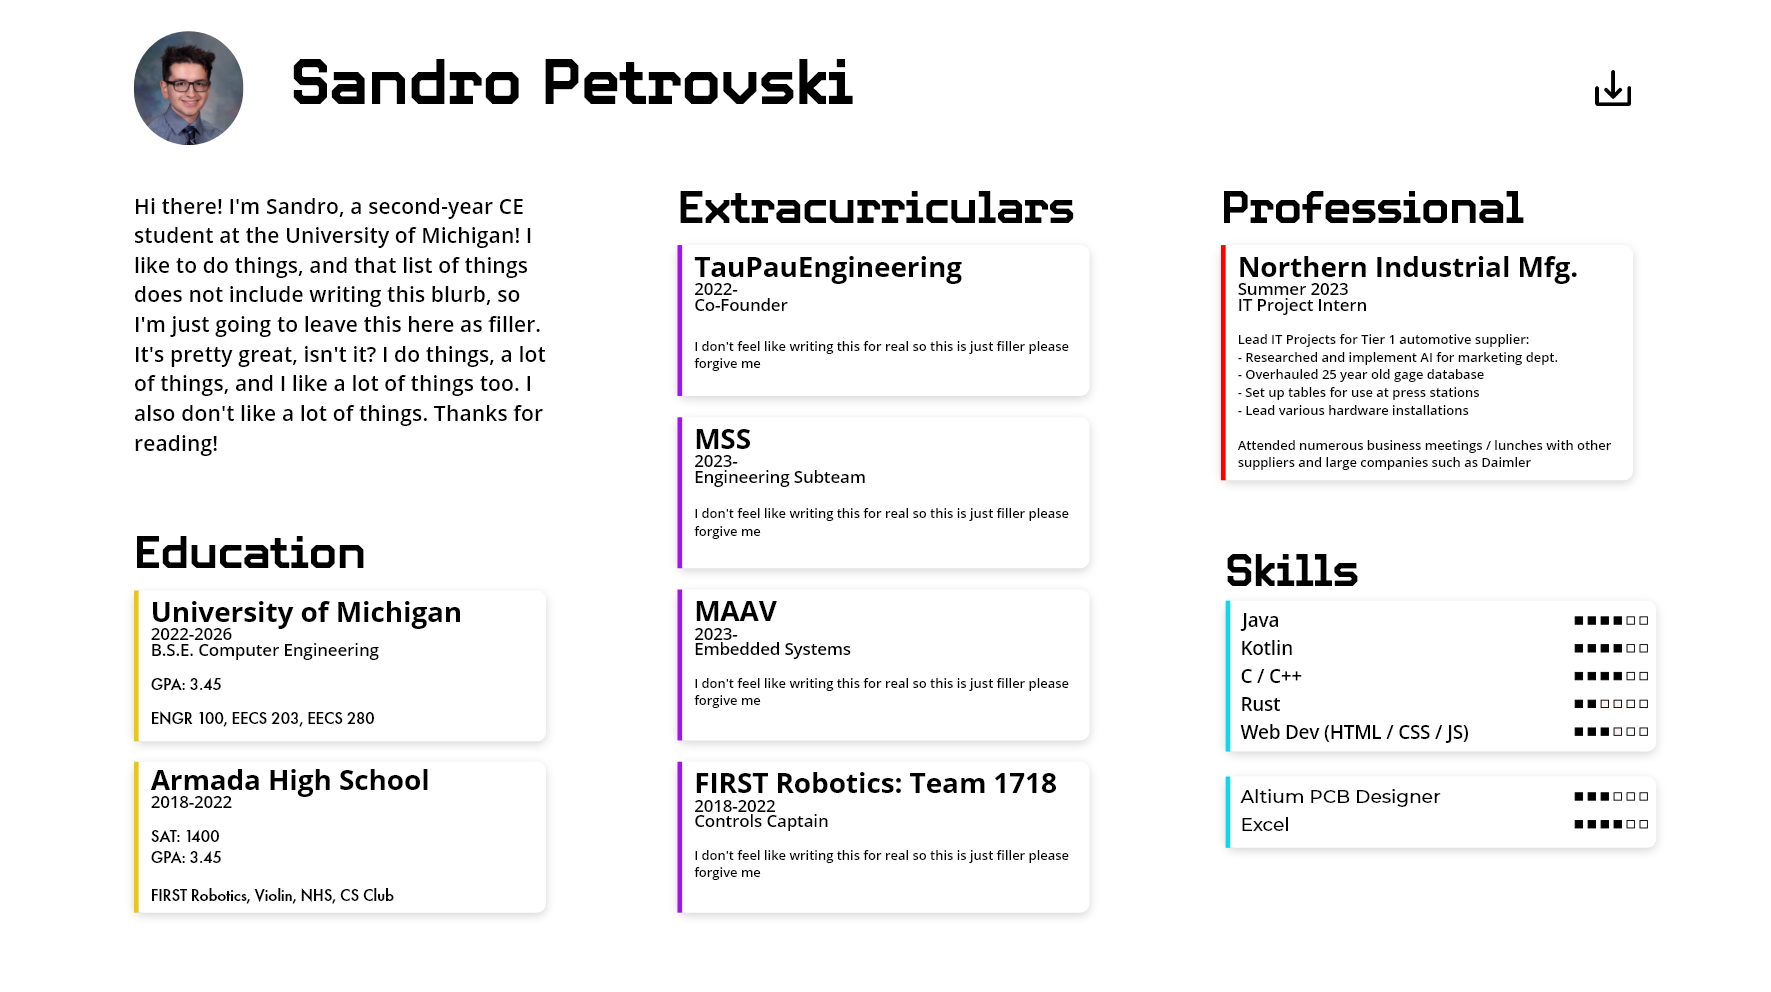
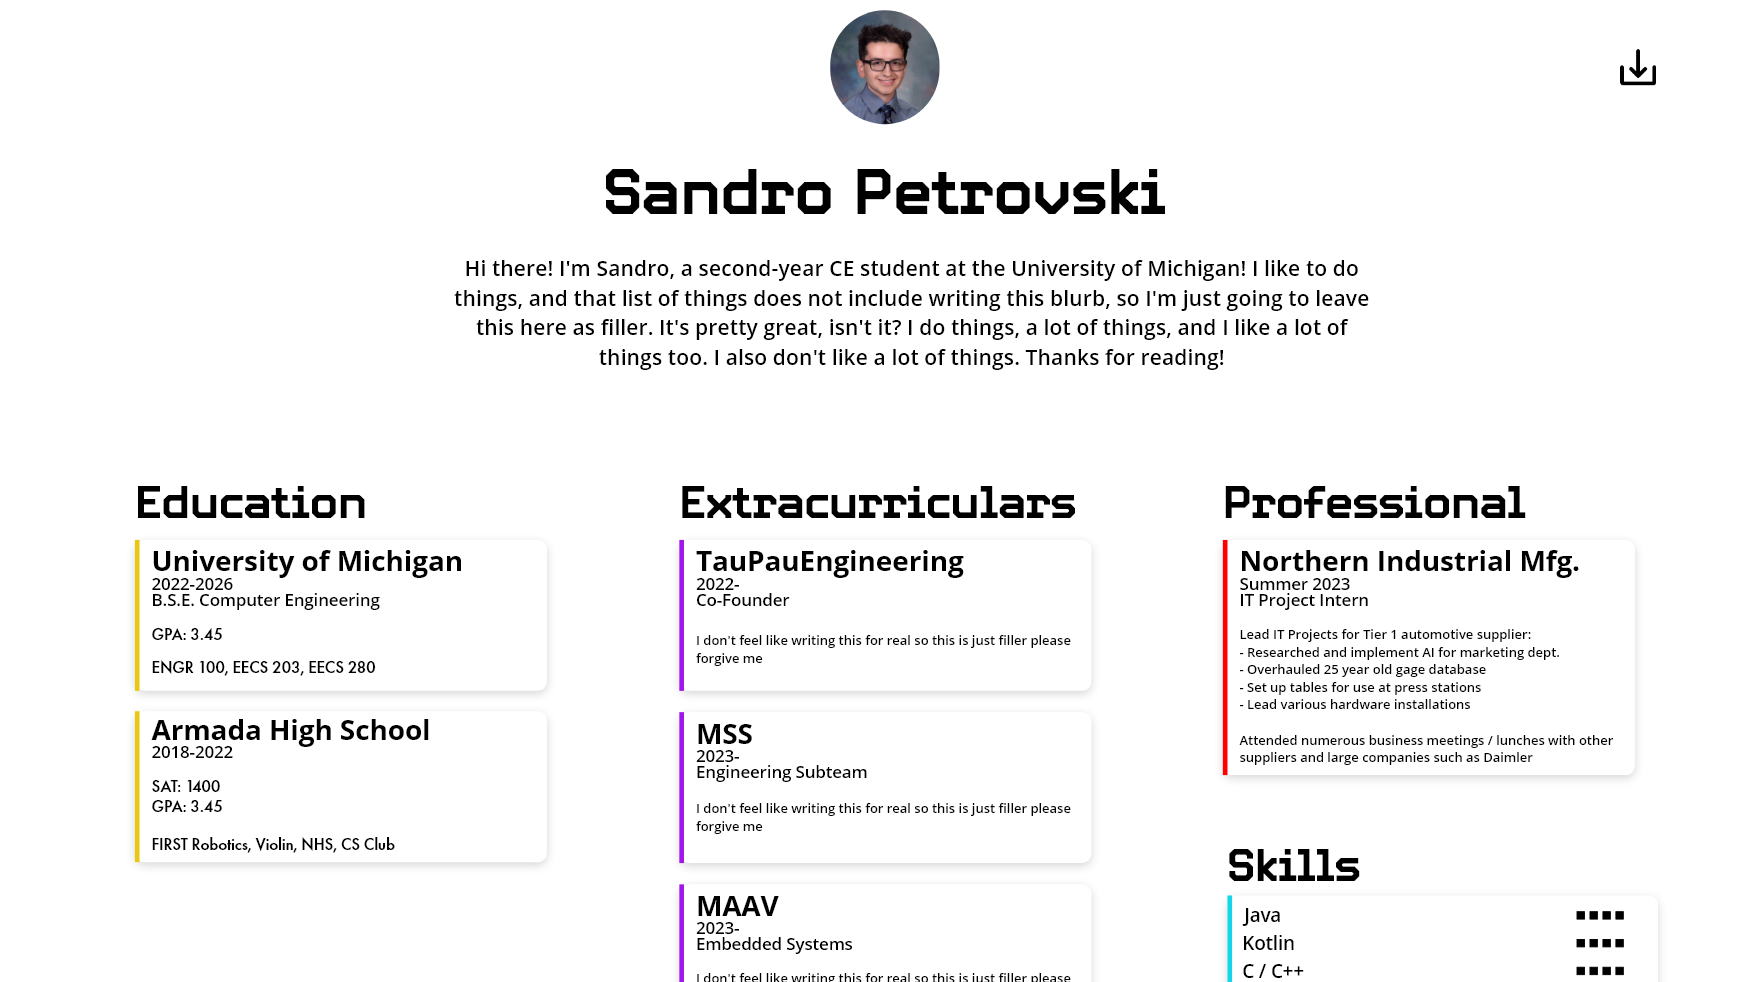
As you can see, it took about 12 iterations before I ended with something I was happy with, and that's completely normal! The initial design process is lengthy and a bit boring at times, however I cannot stress the importance of it being completed at maximum effort enough, as it will make the future development of the project much smoother. For reference, here's the implemented version as of writing this:
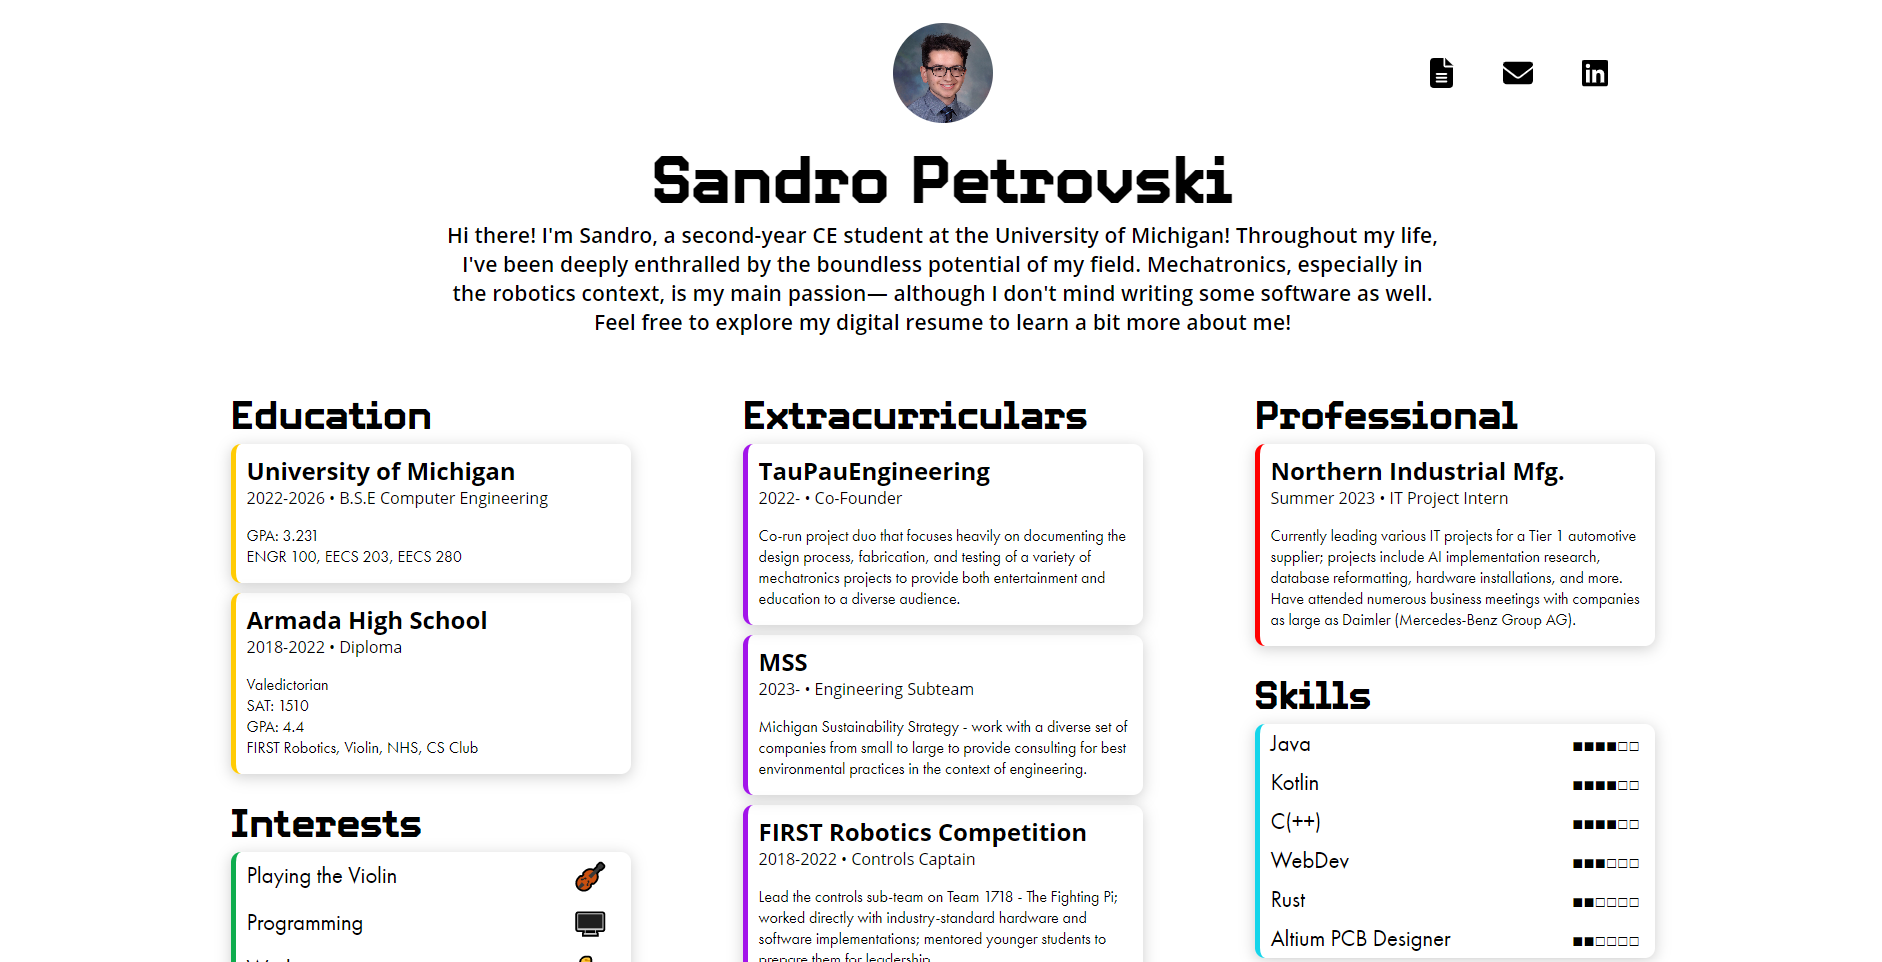
Notice how it's not exactly like the last mockup? That's okay, too! Some design work does occur during implementation, but since I had the bulk already completed that made my job much easier.
Implementation
I won't get too deep into the nitty-gritty details here, but I do want to highlight some cool technologies that were used in the development of this project.
Basic Overview of Web Dev
Firstly, for those who don't know anything about the process of web development, I'll give a brief overview. If you already have a solid foundation, feel free to skip this section.
The content of a site is usually defined within HTML (HyperText Markup Language), it isn't a programming language per se, but instead a markup language as the name implies. To give an example from this project:
<section id="header">
    <div id="header-top">
        <div id="portrait">
            <img src="images/portrait.jpg" alt="portrait">
        </div>
        <div></div>
        <div class="links">
            <a class="link" href="https://materials.tpeng.cc/resumes/sandro_petrovski_resume.pdf" target="_blank">
                <font-awesome-icon class="linkIcon" icon="fa-solid fa-file-lines"></font-awesome-icon>
            </a>
            <a class="link" href="mailto:[email protected]" target="_blank">
                <font-awesome-icon class="linkIcon" icon="fa-solid fa-envelope"></font-awesome-icon>
            </a>
            <a class="link" href="https://www.linkedin.com/in/sandro-petrovski-4694411ab/" target="_blank">
                <font-awesome-icon class="linkIcon" icon="fa-brands fa-linkedin"></font-awesome-icon>
            </a>
        </div>
    </div>
    <h1 id="name">Sandro Petrovski</h1>
    <p id="blurb">Hi there! I'm Sandro, a second-year CE student at the University of Michigan! Throughout my life, I've
        been deeply enthralled by the boundless potential of my field. Mechatronics, especially in the robotics context,
        is my main passion— although I don't mind writing some software as well. Feel free to explore my digital resume
        to learn a bit more about me!</p>
</section>
This is what defines the entire header section for this project (the portrait, links, and blurb). You may notice that the structure is mainly composed of tags in the format <p></p> with the first tag being the start of the object, and the second tag being the end. This is largely how HTML is structured, with additional attributes that can be attached to these tags to achieve certain functionality. If you want to learn more about HTML, head over to W3Schools (that's where I learned it!)
Next, the style of the page is defined using CSS (Cascading Style Sheet). For this project specifically, I'm using a language called SASS which is dubbed "CSS with superpowers." The exact reasonings for this choice aren't incredibly important, but just keep in mind that SASS is simply an abstraction over CSS and it will eventually be converted to CSS before it is actually deployed onto a web server.
Here's what some of the SASS from this project looks like (this specific excerpt is essentially pure CSS):
body {
  display: grid;
  width: 80vw;
  margin: 0 auto;
  justify-content: center;
  grid-template-columns: 100%;
}

#portfolio {
  display: grid;
  grid-template-columns: repeat(auto-fit, minmax(350px, 1fr));
  justify-items: center;
}

#portfolio-header {
  text-align: center;
  margin-top: 20px;
  margin-bottom: 10px;
}
I won't get too much into it, but all CSS does is attach attributes to elements you defined in HTML in order to change appearances (position on page, color, etc.) Feel free to visit W3Schools for additional info on CSS if interested.
Lastly comes the actual "code" of a website, typically written in JavaScript (or TypeScript, what I used, which is essentially JS with stronger typing). This handles any backend logic that needs to be performed in order for the page to function.
For example, I used it to import the link icons:
import { library } from '@fortawesome/fontawesome-svg-core';
import { FontAwesomeIcon } from '@fortawesome/vue-fontawesome';
import { faFileLines, faEnvelope } from '@fortawesome/free-solid-svg-icons';
import { faLinkedin } from '@fortawesome/free-brands-svg-icons';

library.add(faFileLines, faEnvelope, faLinkedin);
This is a bit more complex, but again if you're interested W3Schools does a good job at teaching it.
Framework
As a developer, I always seek out new and different ways to make my workflow more efficient, and my code more readable and maintainable. While I 100% could have completed this project in raw HTML/CSS/JS without any external libraries, it would have been a much slower and inefficient process.
There are several mainstream front-end UI building libraries for JavaScript out there, with React and Angular being among the most popular. I chose Vue, mostly due to previous experience. Fundamentally, the framework's main job is to make UI development and integration feel more like a first-class feature in the web stack (HTML/CSS/JS). I'll spare excessive explaining with an easy example from this project:
<card :title="'FIRST Robotics Competition'"
      :years="'2018-2022'"
      :position="'Controls Captain'"
      :desc="'Lead the controls sub-team on Team 1718 - The Fighting Pi; worked directly with industry-standard hardware and ' +
               'software implementations; mentored younger students to prepare them for leadership.'"
      :color="'#A215EA'"></card>
This block renders the following output:
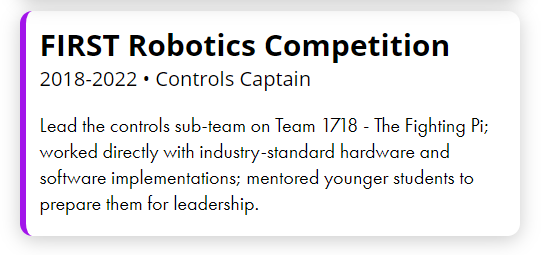
Notice how I didn't need to worry about any text sizing, positioning, etc? That's because I defined this card as a component:
app.component('card', {
    props: ['title', 'years', 'position', 'desc', 'color'],
    template: '<div class="card">' +
        '            <div class="card-line" :style="{ \'border-left\': \'5px solid \' + color }"></div>' +
        '            <div class="card-content">' +
        '                <h1 class="card-title">{{ title }}</h1>' +
        '                <p class="card-position" v-if="years">{{ years }} • {{ position }}</p>' +
        '                <pre class="card-desc" v-if="desc">{{ desc }}</pre>' +
        '            </div>' +
        '        </div>'
})
Without the framework, I would have needed to essentially copy-paste the HTML in the "template" block over and over again, this is much more efficient. Pretty cool, huh?
Module Bundler
Web development requires quite a bit of file management, from installing JavaScript libraries to converting TypeScript to JavaScript, SASS to CSS, and bundling all the files together to be ready for production. This can all be done manually, however services like WebPack make it much easier and also add additional features along the way.
I won't get too much into the specifics but I wanted to highlight two major features that I used extensively:
webpack serve --mode=production
This creates a temporary web server that allows you to view changes you make to the website in real time, automatically refreshing when you update any file within the project. This is incredibly useful during the design process to visualize your work.
webpack --mode=production
This is a single command that bundles the entire project into a public/ folder which is ready to deploy to a web server.
Moving Forward
This project is currently live for Sandro at https://sandro.tpeng.cc and will eventually be live for Tyler at https://tyler.tpeng.cc. They will serve as both of our personal pages on TPE for the foreseeable future, highlighting our favorite projects and also serving as a point of contact.
I hope you enjoyed this superficial overview of web development and the digital resume project, we hope to provide some updates on the Useless Box in the near future, so stay tuned!